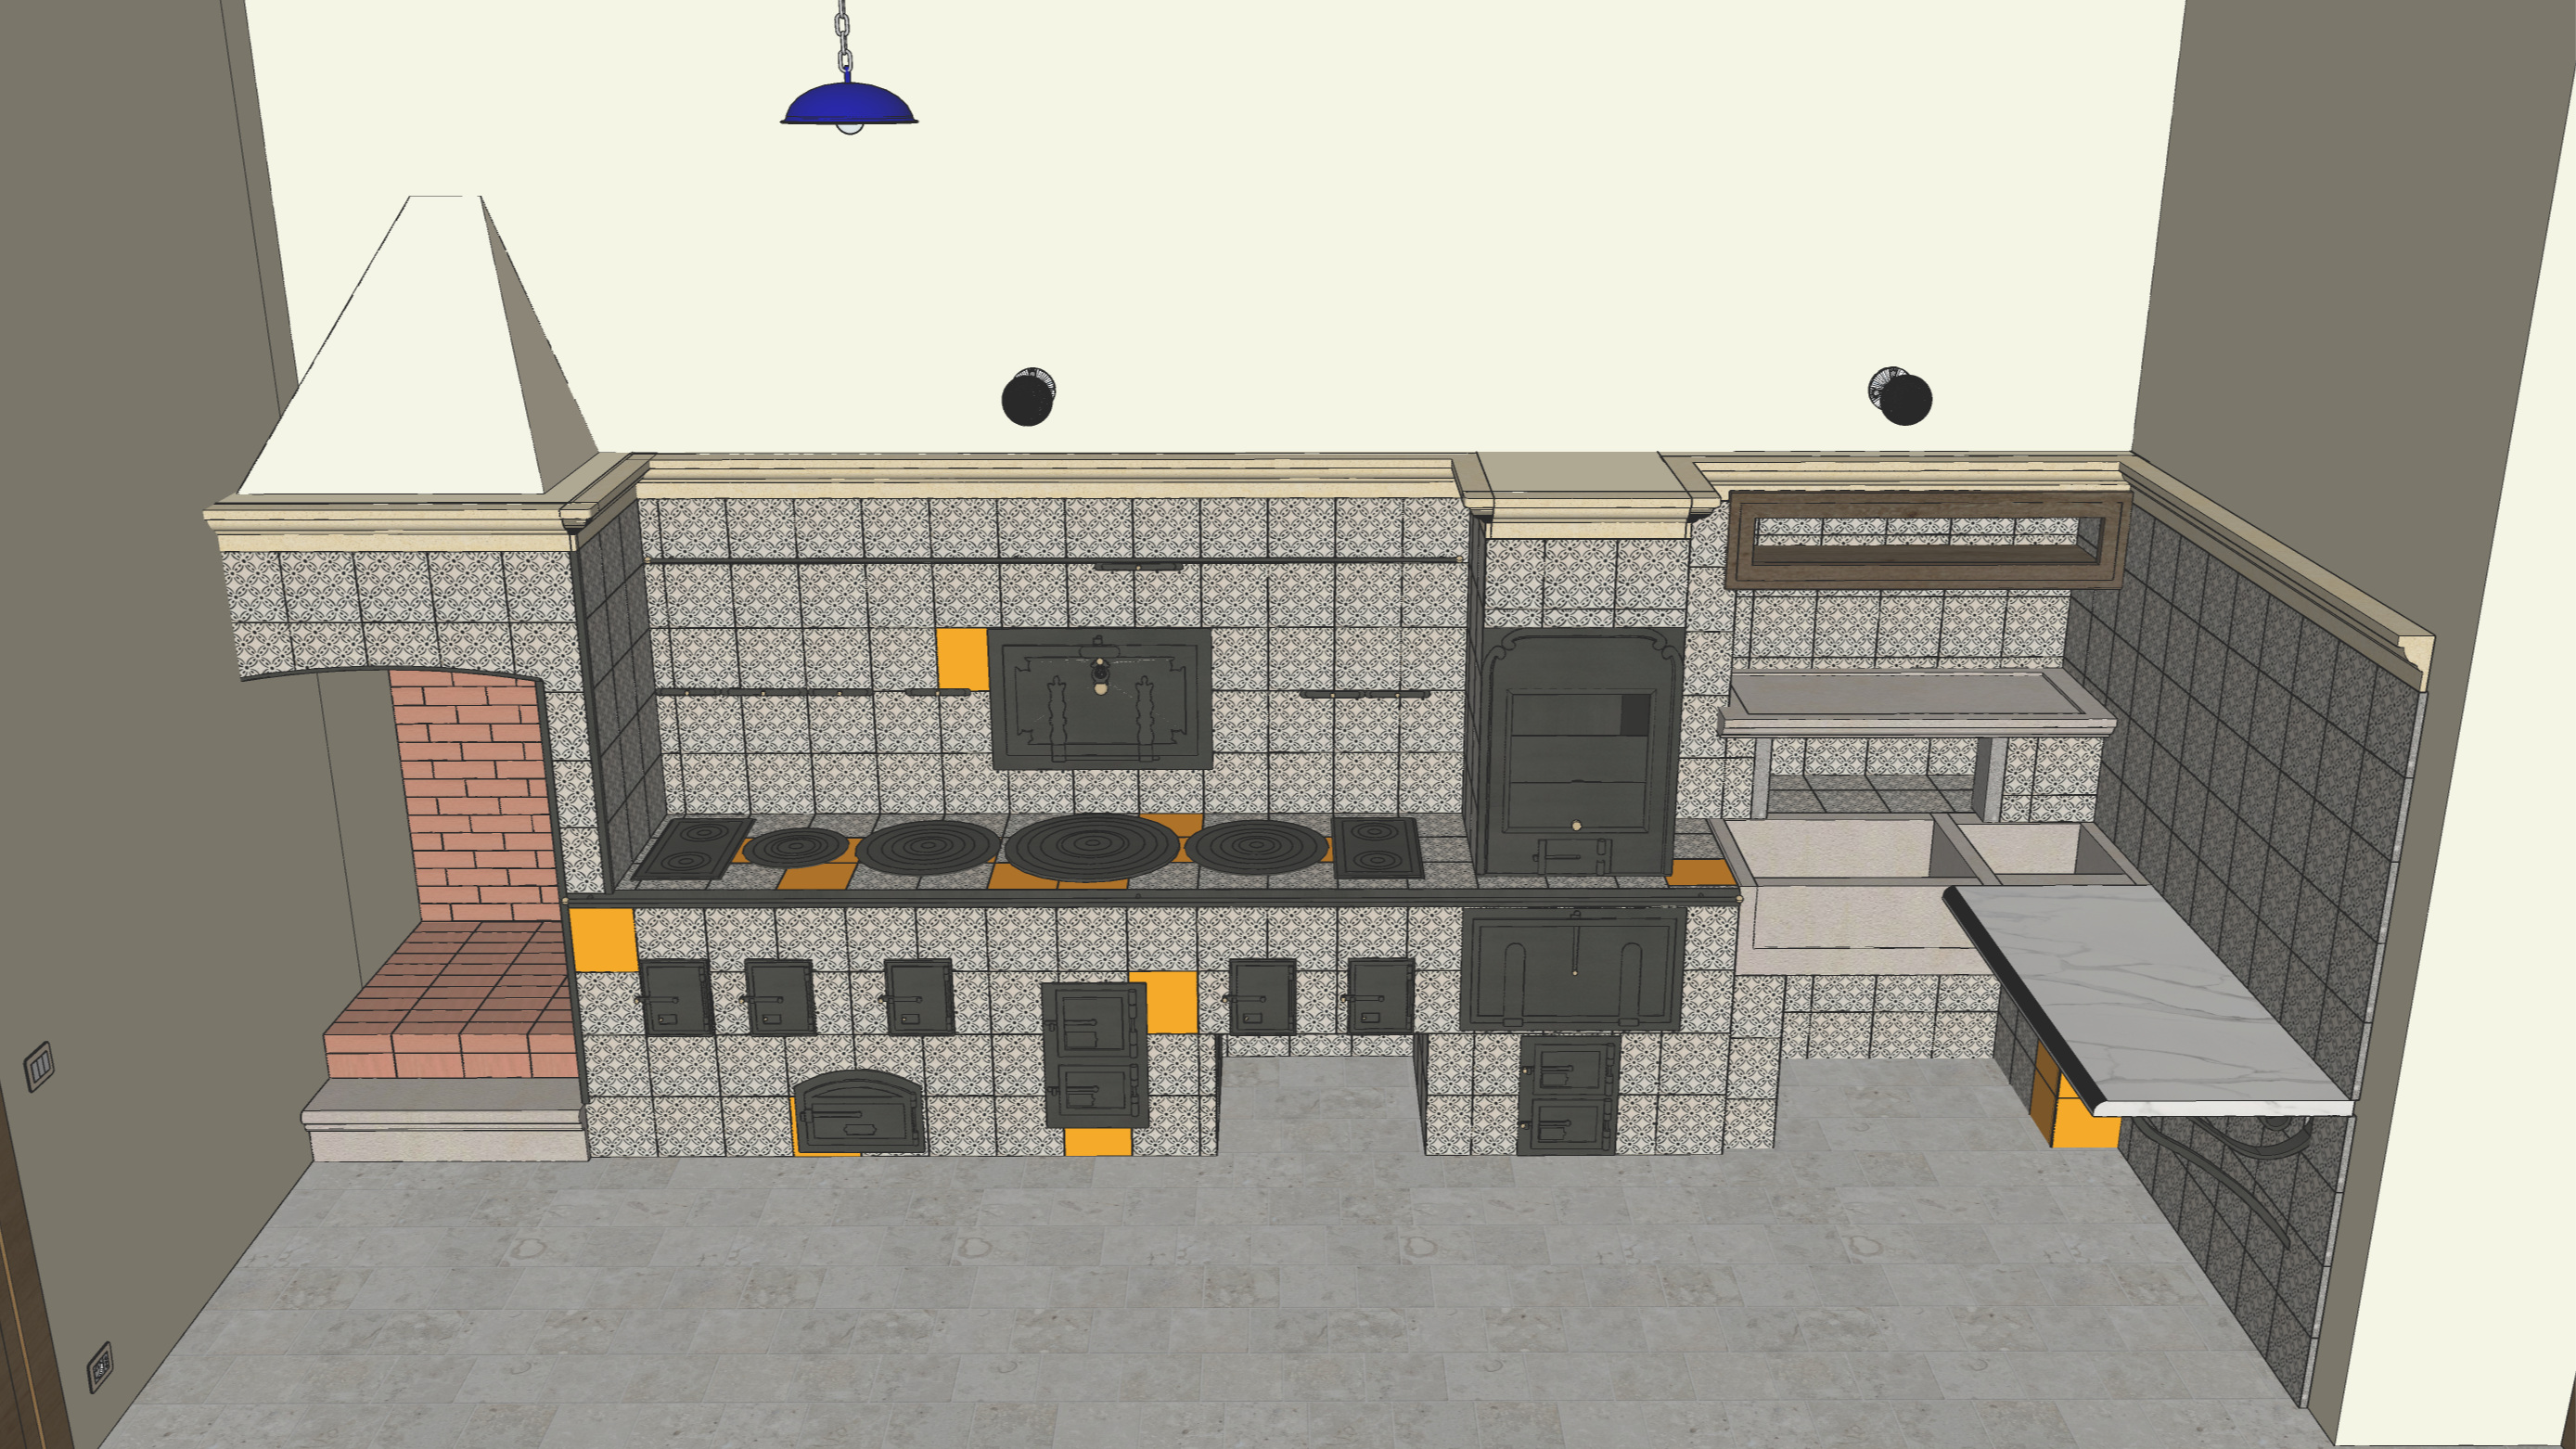


centenary kitchen, hero img
- centenary kitchen, Apulia_Italy -
01

storytelling

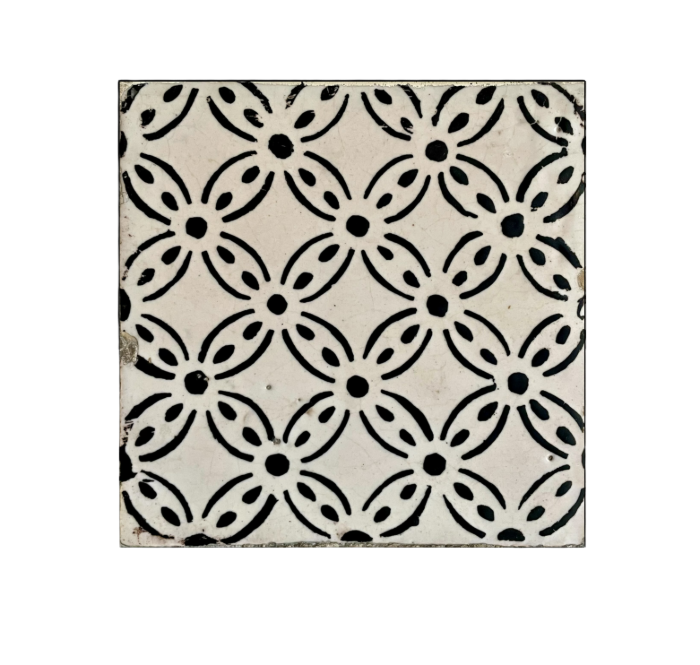
A kitchen with more than a century of history, built in 1901 in a small village in the Tavoliere delle Puglie, designed by a lawyer who devoted himself not to the legal profession but to his passion for olive groves, vineyards, wheat fields, and design. Its L-shaped layout, about 7.5 meters long, covers an entire side wall and part of the adjacent one, next to a balcony that provides natural light. It features eight burners of different sizes, each with its own wood-fed firebox and draft controls to regulate heat intensity. There is also a sink carved from a single block of stone and an internal shelf for storing tableware. The true centerpiece is the cement tile flooring: around 375 black-and-white patterned tiles, most of which are remarkably well preserved despite their age. My curiosity led me to restore the damaged ones, beginning an in‑depth search that, after many emails, eventually brought me to a manufacturer in Morocco. Shipping costs will exceed the price of the tiles themselves, but sometimes taking a risk is the only way forward.

02
burner
burner

dimension: external diameter from 140 ± 500 mm, t. 30 mm;

material: iron;

tile_cementina
cementina [tile]

w. 200 x l. 200 x t. 20 mm;

feeder
feeder

dimension: w. 190 x h. 240 mm;

materials: iron and brass;

03
steel
kitchen, in blu iron to be recovered

The restoration process begins with cleaning the metal using diluted neutral soap and ensuring complete drying, followed by rust removal using abrasives, rust converters, or natural solutions like vinegar or lemon. Once cleaned, a specific iron primer is applied—transparent options are suitable if a raw finish is desired—while decorative frames should be brushed and protected with clear coatings. The work ends with 2-3 coats of antioxidant enamel applied between 10 °C and 25 °C, plus lubrication of all hinges. The full restoration takes approximately six working weeks.

tile_cementina
kitchen, in orange tiles to be replaced

The replacement process involves removing the damaged cement tiles with a hammer and chisel, cleaning the substrate thoroughly, and preparing a new, level mortar or adhesive bed. The new tiles are then positioned with spacers, aligned carefully, and pressed to ensure proper adhesion before allowing the base to dry. Once set, the joints are filled with an appropriate grout and the surface is cleaned. The work concludes with a protective sealant applied to the tiles to safeguard them from stains and moisture over time. There are twenty damaged cementine that require replacement.